
Your precious photographs do not belong in the dark, hidden recesses of a computer. Create your own photo gallery to bring them to light and reflect the artist in you! This can seem daunting, but with some practical and creative advice on how, you should be able to find the result that suits your taste and skills.
Here are some methodical steps to help you along the way:
- Decide on the best place for your photo feature wall. Remember that photos are busy on the eye, so it is advisable to position them in more private areas, such as a hallway, staircase or bedroom.
- Decide on the size of it. This will be determined by the quantity and size of the photographs you want to include.
- Measure the space on the wall that you want to fill. This will have a big impact on how you arrange your photos.
- Once you’re clear on that, arrange the photos on a big sheet of craft paper (or newspaper) on the floor. If you’re planning a large collection, use several sheets of paper taped together.
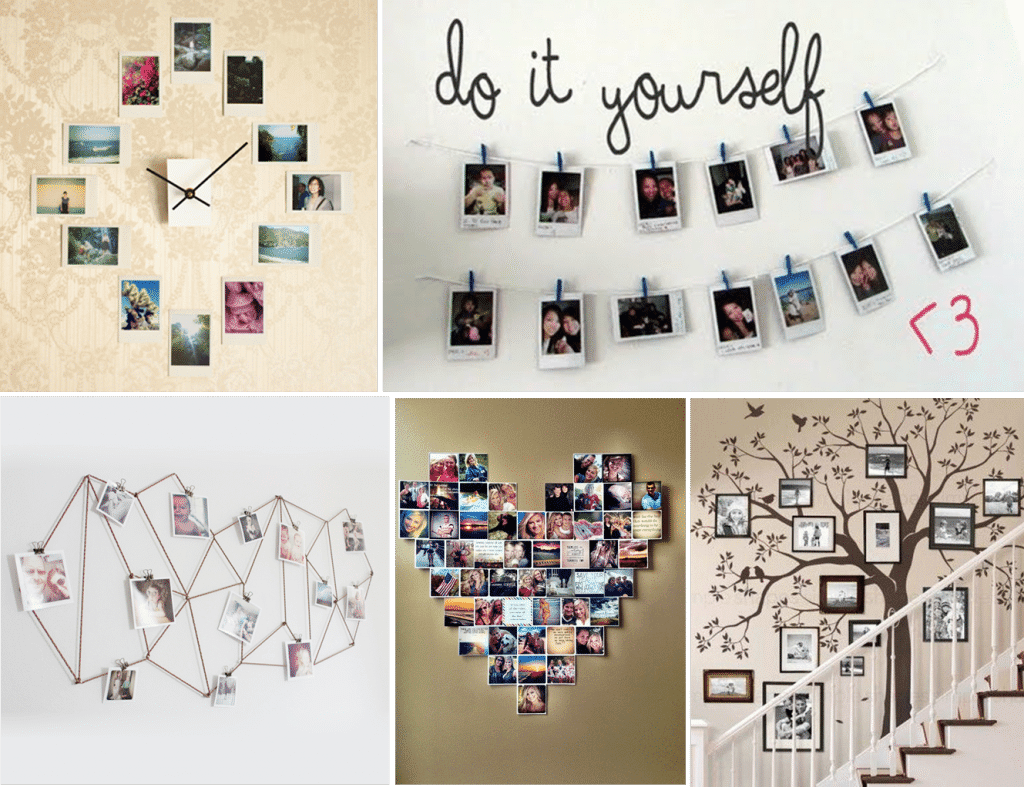
- This is the most important step: decide on the shape of your wall feature. If you’re a traditionalist, the safest option is a rectangle, a square, a circle or an oval. If you want to make it a private, personal statement, the options are infinite: a heart, a cloud, a star, or any abstract shape of your choice.
- When you’re happy with the arrangement, use painter’s tape to secure them, as this won’t damage the photos. Then trace each photo.
- It is of vital importance to ensure that your nails are in the right spot. Measure very carefully to ensure that they’re in the right place according to each frame and mark the spot for each photo.
- Once done, remove the photos and tape the paper to your chosen feature wall. If you are sure that your desired effect has materialised, you can begin to lightly tap your nails through the paper and into the wall.
Now for the creative side of your design:
For a photo gallery that fills a large part of a wall, individual frames for the photographs are impractical and unnecessary. If you are mounting a smaller selection, there are countless ideas you can try to turn the display into something unusual, unique, stylish and artistic. By decorating them, store-bought frames can easily be turned into something more original and personal, and cardboard photo frames are easy and inexpensive to make. All you need is your required thickness and chosen colour of cardboard, glue and scissors. Cut out the base into your desired shape – an oval, a circle, heart, square, rectangle or any more abstract shape of your choice. Cut out your frame-shaped piece to fit the base, and glue it onto the solid piece, leaving an unglued section at the top from where you will slide in the photo.
Now the fun really starts! Turn your frame into your own work of art by adorning it with any one of the following ideas: buttons, wool, clothes pegs, wine corks, beads, ice cream sticks, craft wire twisted into desired shapes, or a mosaic of different colours of cloth. For a rustic effect, opt for natural elements like feathers, dried flowers, twigs, pieces of shell, or delicate bits of driftwood.
A last creative option is to discard the frame-idea altogether. Here are some unusual display ideas that might get you fired up:
Udumo Group deliver interior décor and design services by empowering unemployed people with skills development initiatives. We believe in investing in the individual, nurturing inherent skills, and uplifting communities. We hold as our mission making the future sustainable by mentoring meaningful change in the wider environment. Our interior design philosophy is to design beautiful spaces that are both functional and timelessly pleasing. We have proved that promoting the values of creative excellence, discipline and commitment can bring forth the beauty within each person and reflect it in both private and public living spaces around them.
For information on Udumo Group, visit: www.udumogroup.co.za